PEGBOARD ORGANIZER TUTORIAL {DIY}

I am so excited to have a place of my own in our house to be creative – even if it means converting a windowless basement storage area into a craft room. (For the record, I want to officially state that I originally offered up the basement to my husband as a “man town”, but he decided the shed was more suited for a manly space.) I am appreciative of his willingness to let me have a crafting room, though part of me guesses that he is thrilled to get my projects and clutter off of the dining room table.
Recently, my husband and I built a pegboard organizer for my crafting tools, so that they would be easily accessible. Below is a tutorial for creating your own pegboard organizer:
Select and Paint Pegboard
I chose to use a thick piece of pegboard so that it would have less flex when hung. I painted it using Martha Stewart’s Chalkboard Paint in gray. I thought it would be fun to be able to doodle borders around my supplies in chalk or label certain supplies if I saw fit.
Create a Wood Frame to Mount Pegboard
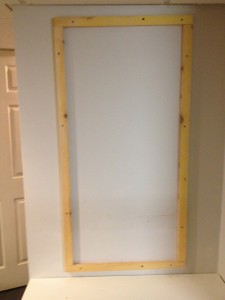
Since my pegboard was 24″ by 48″, we cut two 1″ by 2″ pine boards into 2 – 24″ pieces and 2 – 45″ pieces (We subtracted 3″ from the height to make up for the 1.5″ width of the top and bottom boards.) Our initial plan was to have a middle cross bar for support, but we found that with the thick pegboard there was very little give, so we axed that plan to leave more holes open for hanging items.
I spray painted the edges of the wood before hanging them to give them a more finished look. We then secured each piece of the wood frame to the wall before attaching the pegboard, ensuring that we either screwed the wood into a stud or used a drywall anchor (pegboard is heavy!).

Attach the Pegboard to the Frame
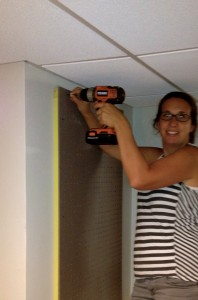
We used screws and attached the pegboard to the frame using a generous amount of screws (3-4 per side).

Add Hardware
I added an assortment of hooks, shelves, and baskets made for pegboards and refinished two IKEA wire baskets for holding items like Mod Podge and glue with a coat of Rust-oleum Eden to tie in with the color scheme of the room. I used a screwdriver holder for my chisel and engraver, and mason jars for extra items like washi tape and Sharpie markers.
My pegboard organizer is ready for me to use with room to grow! Who wants to come craft with me?
P.S. The biggest problem I have right now is the lighting for photos in the basement. Even with all of the lights on (2 pocket lights, 1 table lamp, a closet light, and the (current) storage room light), I cannot get a decent photo in my dungeon. The walls are painted a lovely shade of gray, yet they look brown in every picture. I need some major photo help. (Anyone?)


Leave a Reply